
Note: Our common Windows 10 problems feature has been fully updated. This article was first published in July 2015.
Windows 10 is now running on over 350 million PCs, tablets and smartphones, making it one of the most popular operating systems in the world. The successor toWindows 8.1 has been available for a little over a year now, which has given users plenty of time to get to know the OS.
Many of the initial quirks, bugs, and other annoyances that Windows 10 launched with have been fixed while others persist. Issues with printer connectivity, for example, have plagued users – and of course the recent Anniversary Update brought problems of its own.
At any rate, if you’re suffering with the operating system, we’ve compiled a guide to 60 of the most common Windows 10 problems, as well as instructions on how to fix them. Read on for some troubleshooting goodness…
- Also check out our collection of how to use Windows 10 guides
If you’re planning to move to Windows 10, actually installing the OS is the first area you could potentially run into problems with. Installing a new operating system requires a certain amount of free space on your drive so that it can be downloaded and certain elements can be run successfully.
For Windows 10, the space requirement is 16GB, which should be kept free on the main system drive the computer uses. This is actually the same as previous versions of Windows, so if you’ve upgraded before you can most likely do it again.
To check how much space you have left, go to My Computer (or This PC depending on the version of Windows you’re running) where any drives you have will be listed. You can see the remaining space indicated underneath each drive, or you can right click and select Properties for a clearer overview (the system drive is usually C:).
Just as with space requirements, your PC will also have to be capable of running Windows 10. This means that it must reach certain minimum system requirements.
The requirements for running Windows 10 are relatively low: A processor of 1GHz or faster; 1GB (32-bit) or 2GB (64-bit) of RAM; 16GB of free drive space; Microsoft DirectX 9 graphic device; and a Microsoft account combined with internet access.
To find out your PC’s spec, go to Control Panel and select System and Security, then System.
Some users have reported issues with activating their copies of Windows 10, which could have been down to a number of different reasons. In some cases, the easiest way to get around the problem is to purchase a legitimate copy of Windows 10.
Unlike previous versions of Windows, the latest one is almost exclusively available online, which means that official Microsoft websites are the best bet for your purchase. The company was giving the OS away for free, but that promotion has now ended.
Microsoft has a helpful website that provides a downloadable copy in either 32-bit or 64-bit versions.
If you do find that you’re unable to activate Windows 10 successfully, handily Microsoft introduced a new activation troubleshooter feature with the recent Anniversary Update. You’ll find this in Settings, then click Update & Security, go to Activation and select Troubleshoot (you won’t see this option if the OS has been activated).
Windows 10 is, in many ways, a truly internet-based operating system. Mostly, this is a bonus but there are times when it isn’t – and Microsoft’s attitude towards operating system updates is one such time.
The most annoying part of automatic updates is the restarting, which can seemingly come at random (and inconvenient times). The simplest way to counteract this is head to Windows Update (in Settings > Update & Security), click on Advanced Options and then Notify to Schedule Restart, which means the OS will request a reboot rather than trampling all over the work you’re not quite done with yet.
Each version of a new operating system comes with its own set of backwards compatibility issues and Windows 10 is no exception.
The transition from Windows 8.1 to 10 is far less jarring than the move fromWindows 7 to 8 was, but there are still certain applications that can become broken and, in some cases, cease to work at all.
One such application is Chrome, which some users have even had to fully delete and reinstall. If a program isn’t working with Windows 10, try looking in the Windows Store for an update and, if that doesn’t work, delete and reinstall it.
Over time, more and more developers will get round to updating their programs for Windows 10 so, if you’re reading this a few years from now, this likely won’t be much of a problem anymore.
Data security is incredibly important, especially as hackers become increasingly sophisticated and the number of cyber-attacks is on the up.
Windows 10 comes with a decent set of built-in protection measures, but you can never be too careful. One such feature that should be disabled by privacy-minded individuals is Wi-Fi Sense, which automatically shares the Wi-Fi password across Windows 10 devices on the same account.
Microsoft updated Wi-Fi Sense to share less data, but switching it off is the ideal way of preventing anything you don’t want happening. To turn it off, go to the Start Menu, select Settings and click on Network & Internet, then Wi-Fi, and head to Manage Wi-Fi Settings – turn off all the options in here.
Also in Settings, it’s possible to get an overview of everything else happening on Windows 10 in terms of privacy – unsurprisingly, under the Privacy section. In here, you’ll be presented with a bunch of toggles that adjust some privacy options to help keep everything under control.
Printer compatibility can be an issue for older devices. If you’re jumping from Windows 7 (or earlier) to Windows 10 then it’s definitely worth updating all available printer drivers, which should help prevent them not working post-upgrade.
Doing this is simple. Just search Google (or Bing, depending on your preference) for the name of your printer and download the latest Windows 10 compatible drivers. Follow the manufacturer’s instructions to install them and you’re good to go.
Microsoft ships Windows 10 with Edge, the successor to its Internet Explorer browser (although IE is still present in the OS). For many people, however, using Chrome or Firefox is the norm, no matter what Microsoft wants.
To install Chrome or Firefox – and get back to normality – open Edge, search for either, and find a Windows 10 version. Download it, install it, and make sure it’s set as the default browser option so that Edge doesn’t keep reappearing. To do this, head to Settings, System, and click on Default Apps – click under Web Browser and you can then select your preferred default browser.
If, however, you do want to use Edge then you’ll find it’s actually a decent browser, despite a few notable flaws.
One thing to note in particular is that running Edge on a touchscreen PC or tablet yields the best results as Microsoft has optimised it to support touch or pen input. Websites can be doodled on, shared, and generally messed around with in a way that other browsers don’t really facilitate.
Microsoft has also focused on making Edge fast and, above all, battery efficient. Anyone who has ever used Chrome on a laptop knows that it just sucks up battery life, so this may be a refreshing change for some.
Favourites, browsing history, passwords, and so on can be shared between Windows 10 devices, too, which means that using Edge on one machine will be the same experience as using Edge on another. It’s worth taking some time to give Edge at least a tryout before you decide it’s a problem and make any vows involving bargepoles and so on.
The browser does come with some annoying features, however. Because it’s a Universal Windows App, Edge runs on smartphones, tablets, PCs, and almost any other device. This means that it sometimes has a problem with being too much like a phone app rather than a PC program.
One of the ways this manifests itself is by sometimes refusing to play media when minimised, just as a phone app wouldn’t. There’s currently no fix for this, unfortunately, although you could obviously use a different browser until the problem is addressed by Microsoft. Or just use an entirely different app to stream your music.
Want to block pop-up ads in Edge? Fortunately, putting a stop to these bothersome things isn’t difficult. Within the Edge browser, you need to click on Settings (found in the top-right ‘ellipsis’ menu, the three dots), then click on View Advanced Settings – in here you need to turn on Block Pop-ups.
Many people just don’t like Bing, most likely because they have always used Google. That’s fine, and we’re sure Microsoft understands.
Changing Edge over to Google is relatively simple. Navigate in Edge to Google.com (or Yahoo, or whatever your preference) and click the ellipsis button in the top-right corner. A drop-down menu will appear: select Settings, and then navigate down to click View Advanced Settings. From here, scroll down to ‘Search in the address bar with…’ and select Add New.
Some users have reported that Add New often has no results in it, suggesting that no new search engine can be added. This isn’t true. To get past this, close and then reopen Edge and (hopefully) some results will have appeared.
If you’ve bought a Windows 10 machine that has a touchscreen then you are, by and large, getting the best experience with the OS.
Ever since Windows 8, Microsoft has been optimising its operating system for the finger – and sometimes pen – with large tiles, easy-to-scroll menus, and so on.
However, it can still be a little disjointed, but the easiest way to remedy this is simple: head to Start > Settings > System > Tablet Mode. Then turn Tablet Mode on – this optimises Windows 10 for fingers rather than pointers, making it far easier to use.
Having a touchpad-enabled laptop is also good for Windows 10, but some users have reported that the upgrade from Windows 7 (and sometimes Windows 8) breaks it.
One of the ways to solve this is by first checking to see if your keyboard has a key that turns the touchpad off. If it doesn’t – or the right setting is toggled – then head to Devices > Mouse & Touchpad> Additional mouse options.
A new window will appear. From here, select the tab that says Device Settings, then Devices, and then make sure the touchpad is enabled.
If none of these options work, press Windows Key + X, select Device Manager, then the option for Mice and other pointing devices, and update the driver. This should fix things.
Safe Mode is just what you’d expect – a safe way of booting up a PC and running the system with no startup apps and only essential drivers, which should hopefully allow the computer to boot successfully when it won’t otherwise due to some issue or other.
With Windows 10, to access Safe Mode, hold down the Shift key during boot-up (or select Restart from the desktop while holding down Shift).
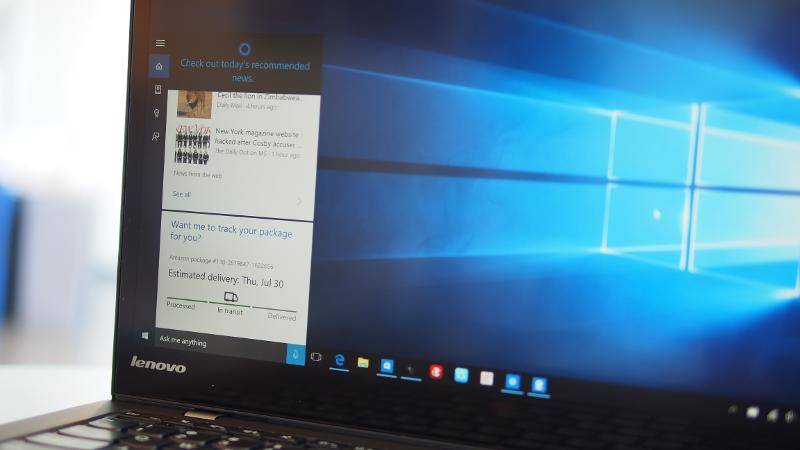
Location-based apps are fairly prominent in Windows 10 which makes it a good idea to let your PC know (roughly) where you are. Cortana, for example, can give far more information if it can accurately pinpoint where in the world it’s being used.
To update your computer’s location settings, head to the Start menu, click Settings, Time & Language, and click Region & Language – then make sure the correct country is selected. To turn on Location services, go to Settings > Privacy > Location, and flick the Location switch on.
There are loads of ways to speed up a PC and Windows 10 comes with several options to do so with ease.
Having fewer programs boot during startup can, for example, make the whole booting experience faster. To streamline your boot-up, press the Ctrl + Alt + Delete keys together and select Task Manager from the resulting screen, then select the Startup tab, and choose which services or apps are allowed to load (right click and select Disable to, well, disable any you don’t want).
Deleting unused programs or files can also speed up a PC.
The lock screen on Windows 10 can be annoying, especially on a computer that doesn’t have a touchscreen to easily ‘swipe’ it away. Windows Hello makes things somewhat easier, but only if you have a compatible computer with the necessary hardware to run the authentication system.
Luckily, Microsoft has provided a solution to the problem of the lock screen, albeit a complicated one that shouldn’t be tried if you’re not confident in tinkering with the Registry. Note that a misstep here can cause serious problems, so if you’re a computing novice, it’s probably best to steer clear of this one.
Okay, warning aside, to do this you need to first head to the search/Cortana box (next to the Start menu) and type in a search for:
regedit
This will run the Registry Editor. From here, navigate to HKEY_LOCAL_MACHINE\SOFTWARE\Policies\Microsoft\Windows, select the Personalisation key and select New before choosing DWORD (32-bit) Value.
Select New Value #1 in the right-hand pane, and use F2 to rename it to the following:
NoLockScreen
Now double click it, and change the value data to 1 and click OK.
It’s a slightly complex process, but after a reboot you should be able to automatically bypass the lock screen.
Annoyingly, Windows 10 ships without DVD playing software as a standard option. Microsoft does offer an app as a download from the Windows Store – called Windows DVD Player, imaginatively – but it costs £11.59 (around $15, AU$20).
The best bet for those who want to watch DVDs is VLC Media Player, which is a free download and was recently updated to support Windows 10. It also supports a host of other file formats – even the weird ones – making it a very useful tool to have around (or check out our 5 best VLC alternatives if you fancy something a bit different).
Microsoft introduced a nifty way to view all of your notifications at once in the Action Center, which is one of Windows 10’s best features compared to Windows 7 or 8.1.
However, it does tend to get clogged up with notifications, including ones that are seemingly useless (we’re looking at you, Windows tips). Luckily, turning these off is easy.
Go to Settings > System > Notifications & Actions, and then simply toggle off any that are not useful or relevant while keeping the ones that are. Individual third-party app notifications can also be switched off.
As more of our lives increasingly spills over onto computers it becomes important that they’re safe and secure. Windows 10 ships with a variety of security features that it’s a good idea to take a look at.
One such feature to be aware of is Windows Defender, which is designed to detect and remove malware from PCs – you’ll find it under Settings > Update & Security. Make sure you’ve got this turned on, if you don’t have another third-party antivirus solution running on your machine.
Another nifty feature is Windows Hello which allows for biometric authentication on your machine (we’ll come back to this and show you how to set it up in the next slide). And a further measure still is Windows Passport, which secures all your credentials in one place (read up more about that here).
It’s impossible to stop all threats, but with its newest OS, Microsoft has taken a long hard look at the areas where Windows was more vulnerable and has patched things up nicely.
Windows Hello is one of the most innovative features that Microsoft has built into Windows 10. Essentially, it lets a user login just by using facial recognition (or a fingerprint) virtually instantly.
The software, which is available to all Windows 10 users, does require special hardware (and most likely won’t work on older computers). Assuming you have the necessary hardware, how do you set up Windows Hello?
You need to go to the Start menu, click on Account, and select Change Account Settings. Select Sign-in Options and set a PIN. Once you’ve done this, there will be an option to Setup under Face. Select this and follow the instructions.
If you’re on a tablet that has 4G, using a mobile hotspot, or surfing the web via a Windows 10 smartphone, then the operating system may have a nasty surprise for you.
Users have been reporting that the default configuration of Windows 10 sucks up data like there’s no tomorrow, potentially putting you over your data allowance, and leaving you with a hefty bill.
Fortunately, there’s an option that addresses the problem. Simply to go Settings > Network & Internet > Wi-Fi. Click Advanced Options and then Set as metered connection. This means that Windows 10 will stop collecting so much data in the background.
Worried someone else might use Cortana on your device? Well, one cool thing that Cortana can do is ‘learn’ a certain person’s voice, making it far more secure than Siri or Google Now, which generally just accept simple commands irrespective of who they come from.
To do this, open Cortana, select the Notebook from the left-hand menu, select Settings, and make sure that ‘Respond to’ is set ‘To me’.
It’ll run you through a few test phrases to get the basics of your voice and tone correct before effectively logging what you say and learning – eventually – to just respond to you.
Windows supports a huge range of devices going back a long way which, inevitably, means that some don’t work as well as others.
Users have reported issues with high-resolution displays and Windows 10, including experiencing blurriness in applications that had been rendering fine on previous versions of the OS such as Windows 8.1.
The easiest way to solve the issue of blurriness is by going to Control Panel > Display and fiddling around with the settings here. There is no one single setting that will fix all issues, so experiment and see what works (and what doesn’t).
To fix blurriness in specific applications, right click on the app’s icon and select Properties. Under the Compatibility tab there is an option to ‘Disable display scaling on high DPI settings’. Tick this and – hopefully – the problems will disappear.
Battery life is important to anyone who regularly uses a laptop, tablet, or smartphone, and of course Windows 10 can be used on all three of those devices.
Microsoft recognises this – as shown by the marketing of its Edge browser as being battery-friendly – and has built several tools into Windows 10 to help cut down on excessive battery drain.
All apps that run in the background can be toggled off, for example, which stops them from sucking up precious juice. And as we saw in an earlier tip, a metered internet connection option can also be used, which cuts down on background data usage.
Windows 10 also includes a dedicated set of power options, which you can find via Settings > System > Power & Sleep. From here, display sleep times can be set and under Additional Power Settings you can select a power plan that means a lighter load for your battery.
Continuing with the theme of avoiding excessive battery drain, if just fiddling with the settings isn’t enough, Windows 10 can also generate a battery report. To do this, head to the Command Prompt Admin (which you get from right clicking on the Start menu), and type in:
powercfg /batteryreport /output “C:\battery_report.html”
This will save a file to any chosen folder – e.g. C:\ in this case, the root of your system drive – which gives you a hugely detailed look at battery quality, cycles, how much charge is left, and much more. The report is a little dense, so be warned on that front.
Another thing a lot of users have complained about is default app choices – i.e. browser, word processor, and so on – changing when updating Windows 10.
The easiest way to change them back is to head to Settings > System > Default Apps. From here, almost every major default app – music, email, maps, calendar and so on – can be chosen based on the ones you have downloaded.
This issue is still an annoyance in Windows 10 (indeed, it affects all versions of Windows and Office). The fix, however, is relatively simple.
If you’re getting a lot of ‘file is corrupt and cannot be opened’ or ‘unable to start correctly’ warnings, then open Command Prompt (again, by right clicking the Start menu) and type in:
icacls “%programfiles%\Microsoft Office 15” /grant *S-1-15-2-1:(OI)(CI)RX
That should fix your problem – if it doesn’t, then try to find each corrupted file, right click, select Change and then Online Repair.
Flickering screens aren’t always down to the hardware and some users have reported issues such as these caused by upgrading to Windows 10.
The easiest way to fix this is to update all relevant drivers for monitors as well as Norton Antivirus, iCloud, and IDT Audio, which are all suspected to be potential causes of these problems. It may even help to uninstall and then reinstall them.
Windows 10 does automatically update drivers, so there is also a chance it’s forcing an incompatible version of a driver onto the PC without realising.
The Start Menu can become cluttered, especially if you have a lot of apps and other bits and pieces that will automatically show up on it.
Microsoft lets you resize the menu as well as add and remove applications, shortcuts, and almost anything else. The easiest way to ditch things is by right clicking and then removing – click uninstall – or you can drag apps or folders directly onto the menu to add them.
Concerned about downloading software that could contain hidden malware, spyware or other nastiness? Then remember that using the Windows Store is safer than downloading apps from the web at large, because Microsoft checks over and vets programs on its store.
You can buy apps, games, films, music, TV shows, and everything else from the store, for reasonably competitive prices. To access the Store, simply find the icon on your desktop – or search for it – and click it. Purchasing is a breeze and everything is tied in with your Microsoft account.
App permission settings effectively control what, and how, certain apps do things. Do you want Facebook to be able to access your contacts, for example?
If not, you can switch this off, or adjust any permissions you’re not happy about, by going to Start > Settings > Privacy. From here, you can select from the list of categories down the left-hand pane to adjust various easy-to-understand options on an app-by-app basis.
For example, going to the Location tab lets you choose which apps are allowed to use information pertaining to your location (assuming you have this turned on in the first place), and in Camera you can tweak which apps are allowed to use your PC’s webcam.
A Microsoft Account (which you can set up by heading to login.live.com and following the instructions) effectively binds all of your devices together by syncing settings, apps, bookmarks, and everything else between different pieces of hardware.
Almost every single one of Microsoft’s main applications – Edge, Office, OneDrive, and so on – uses the main Microsoft account to get information from the cloud.
If you’re wondering how to set up and sync the OS across all your devices, the process is simple – just login to each device with the same Microsoft Account. Then, in the Settings of each device, there will be a set of options concerning what gets shared and how. On your Windows 10 PC, you’ll find this under Settings > Accounts > Sync your settings – first you need to switch Sync Settings on, and then you can adjust what’s shared as appropriate.
If you find that Windows 10 broke the connection of a Bluetooth device (or devices) that was previously paired up just fine with your machine, then there is an easy enough fix for this. According to Microsoft, all you have to do is head to Device Manager (just type ‘device manager’ into the search/Cortana box next to the Start menu), select the Bluetooth driver and update it to the latest settings, which will be compatible with Windows 10. The operating system should be able to automatically search, and then update, the driver.
If that fails to work, un-pairing (or forgetting) the device before re-pairing it should fix the issue.
There’s nothing worse than having disaster strike your computer and then realising you haven’t properly backed up your precious data. Want to know how to do this easily? Fortunately, backing up is a simple task in Windows 10.
Indeed, Windows 10 has many of the same backup features that were present on Windows 7, accessed by going into Settings > Update & Security > Backup.
The options include adding another drive to backup to, or accessing a previous backup on another machine – you can restore from a backup you created using Windows 7, in fact.
OneDrive is also a quick and easy option for backing up files, providing an off-site alternative in case of fire or theft. You’ll find OneDrive under File Explorer (which in turn is under the Start menu).
A black screen on Windows 10 can mean several things, depending on whether you’ve logged into the operating system or not.
If you haven’t logged in, or Windows 10 hasn’t booted, then check your internet connection and boot your PC via Safe Mode. (To access Safe Mode, hold down the Shift key as your machine boots).
If you logged in and then the screen went black, unplug all external devices and, failing that, boot via Safe Mode as above.
If the problems persist, contact Microsoft directly for further advice.
Naturally, you want to keep your Windows 10 PC safe, but do you need to go to great lengths searching for and installing security software to achieve this? Actually you don’t, because the integrated security solutions Microsoft bundles with its OS are perfectly serviceable efforts.
Windows Firewall is one half of Microsoft’s basic efforts to keep your PC safe from malware and other attacks. It’s easy to turn on, but configuring the firewall is a slightly more involved matter.
To switch on the firewall, or rather to make sure it’s switched on as it should be by default, simply type ‘firewall’ into the search/Cortana box (next to the Start menu), and click on Windows Firewall. From here, there’s an option to turn it on (or off), and you can also adjust the relative ‘strength’ of the firewall.
Windows Firewall can be configured as incredibly strong via the ‘Advanced Settings’ option – i.e. it blocks all suspect apps without asking – or slightly weaker, which means there’s a slightly greater risk that your PC will become hit with some kind of infection, but the firewall won’t interfere as much.
The easiest way to find out which settings are best for you is to simply test things out for a few days and tweak as needed. If you forget what you’ve done in the settings or think you’ve messed things up, just click on Restore Default Policy on the right-hand side of the Advanced Settings menu to get things back to normal.
Alongside the firewall discussed in the last slide, Windows Defender is the other half of Microsoft’s essential defensive measures, and it focuses on keeping viruses off your PC by detecting malware and purging any infections present.
Activating Defender is simple: you’ll find it under Settings > Update & Security, and then click on Windows Defender. It’s a must that real-time protection should be turned on to allow Windows to constantly monitor for anything suspicious and step in should a detection occur. That said, even if it’s been turned off, this is such a vital piece of the puzzle that the OS will turn it back on automatically after a while.
Note that if you have a third-party antivirus application installed, Windows Defender will be turned off so as to avoid conflicts. While much criticised in the past, Defender is actually a solid enough security solution these days, and is very nicely streamlined (plus it won’t bother you with any pop-ups like some of the free antivirus programs do). On the other hand, we should note that it still doesn’t score up there with the best rated antivirus packages (even the free ones).
Basic protection from malware aside, what about defending your Windows 10 machine from nefarious hackers? To do this, you can elect to use device encryption, and fortunately Microsoft has provided strong encryption facilities, and it isn’t particularly difficult to set all this up – the caveat being that you need to be running Windows 10 Pro for BitLocker encryption (not Home).
To enable device encryption, go to Start, search ‘encryption’ and select Change device encryption settings. After that, select Manage BitLocker and turn it on, then follow the subsequent instructions. With your data encrypted, if hackers do manage to somehow access it, the information won’t be of any use to them.
The only downside is that performance may take a bit of a hit on older machines, but if you need peace of mind regarding your precious data, it’s worth it.
Windows 10 users have been reporting problems with how it handles sound for a long time now, and most of the issues stem from one simple thing: old drivers.
The aged drivers might work fine with older versions of Windows, but may not perform so well with the shiny new Windows 10. To fix such problems, go to the Start menu and search for Device Manager. Click on the link which will open a new window with a series of options. Select ‘Sound, video, and game controllers’, which will yield a set of results with a sound card option.
Select the sound card, and then select the Driver tab. There will be an option for updating the drivers that you should select. This will take you to the manufacturer’s website where there will be instructions on how to download a new driver.
Once it’s downloaded and installed (of course, make sure to get the Windows 10 version of the driver, if there is one) the problems should hopefully go away.
It’s not uncommon for software, particularly older apps, to encounter glitches or even to fail to run completely with Windows 10. There’s one potential way to get around show-stopping bugs, though: right click on the icon for the app and select Properties, then click on the Compatibility tab. From here, click the checkbox next to ‘Run this program in compatibility mode for’, and in the drop-down menu underneath that, choose the version of Windows that the program ran fine on.
Over time, many developers will update their apps to remove bugs, so the software in question may eventually work just fine with Windows 10. An easy way to help them is by reporting any bugs you find, which can usually be done via the developer’s website. This highlights what’s up, allowing them to (hopefully) work on a fix.
The Blue Screen of Death, also known as a BSOD or a ‘stop’ error, may sound bad but it’s certainly fixable in the majority of cases. When the problem manifests it halts your PC completely, stopping it working and showing a blue screen, usually with some kind of message about restarting or a critical error. Your machine will then have to be rebooted.
To fix this, you can explore several options. First off, be sure to check how much available space you have left on your system drive and, if it’s low, make some room by deleting bigger files or programs you don’t need. Also, ensure all the latest updates are applied to the software on your machine, as having outdated apps can sometimes cause issues.
While you’re at it, also update the hardware drivers of any peripherals, as the problem could be caused by Windows 10 clashing with something. Head to Device Manager, which you can reach by searching for it in the Start menu. Here, you can ensure that the likes of peripherals such as your monitor, webcam, printer or scanner – the extra devices you plug into your machine – have the latest drivers, simply by right-clicking on the device in question, and selecting Update Driver Software. Then click ‘Search automatically for updated driver software’.
It’s also worth bearing in mind that if you’ve overclocked your PC in any way, it’s likely a good idea to turn that off if you keep getting BSODs (it could be causing the instability). Exactly how to do this will vary from machine to machine, but if you overclocked your PC yourself, then you should (hopefully) know how to reverse it in the BIOS. If someone else did it, such as your PC manufacturer, then contact the vendor for exact instructions on how to proceed.
Losing files after a disaster hits because you didn’t back them up is a hugely frustrating experience, but fortunately it’s one that can be avoided easily.
To create a backup, purchase an external hard drive (which obviously has to be larger in size than the data you want to store on it – for recommendations, you may want to check out our roundup of best external hard disks).
You can simply copy your files across to this disk manually, of course, or you can set up File History in Windows. To do the latter, ensure that the drive is connected to your PC, and left click on the Start menu, then click Settings.
From there, click Update and Security and navigate to Backup on the left. See the Add a Drive button next to the big plus sign? Click this.
Windows will scan for available drives on which to back up, and obviously enough, you should select the drive you want to use from the list it brings up. The OS will now get to work and you’ll soon be done; an ‘on’ toggle button will appear to show that the feature is active and automatically backing up your files (and will continue to do so as long as the drive remains connected).
If a physical drive doesn’t suit you (maybe you’re worried about a fire, for instance, or the possibility of the backup disk corrupting) then there are plenty of online options you can use as an alternative. CrashPlan has received very good reviews and comes with various tiers suitable for single PCs right through to businesses.
Alternatively, you could simply use a cloud storage locker like Dropbox, or of course Microsoft’s OneDrive, the latter of which is tied in directly with Windows 10.
Whichever online option you choose, do be warned that sending all your files over a net connection could be a slow process – although that obviously depends on the quantity of files you have, and the speed of your broadband. Also be careful if you have data allowances on your broadband plan.
It can be a good idea to have both a local backup on an external hard disk, and a further online backup – even if the latter only holds critical files and not everything.
Some users have reported that their Wi-Fi connection has become erratic after installing Windows 10.
To solve this problem, the first thing to try is to turn off your router and switch it back on – this will likely fix the vast majority of issues. This is because leaving a router on for a long period of time can cause it to go ‘weird’ (a technical term), just like a PC that is left on for months and months on end. Occasionally, it just needs rebooting.
If issues persist, however, make sure that all the Wi-Fi drivers on your PC are correct and updated. To do this, as before, go to Device Manager (search for it in the Start menu). There will be a section called Network Adapters, which you can double-click on to show your adapter.
Right-click on it and select Update Driver Software, and then click ‘Search automatically for updated driver software’. Now click close. This should solve the problem.
The easiest way to fix a PC booting sluggishly is by reducing the number of apps which are launching on startup, as having too many programs firing up when the computer starts makes the whole process much slower, especially when it comes to older hardware.
To trim those apps, press Control+Alt+Delete together and select Task Manager, then click the link that says More Details. From here, select the Startup tab. Here you’ll find a list of all the apps that fire up when your PC starts. Look through the list of enabled apps and find any that you don’t need – you can turn an app off by right-clicking on it and selecting Disable. Disabled apps won’t automatically load on boot up.
Be careful not to turn Microsoft services off, mind you, or important apps such as antivirus. If you’re unsure whether it’s wise to disable a certain app, Google it to find out.
The recent Anniversary Update to Windows 10 came with the unexpected side effect of disabling some people’s webcams in Skype and other video chat apps.
The best way to tackle this problem is to reinstall the camera’s drivers or check for any updates that are available. To do this, go to Device Manager (search for it in the Start menu) and click on the section for ‘Imaging Devices’. Right-click on the camera you’re using, select Drivers and search for updates from the manufacturer.
Microsoft is aware of this problem and is working on a fix to be patched directly through to Windows 10. Rumour had it that this solution was going to be released in September, but obviously that didn’t happen – hopefully it shouldn’t be long before we see the patch arrive, though.
Is your PC grinding to a halt – and perhaps the hard disk is whirring like crazy? If so, there’s a good chance that one of the programs you’re running may have developed some kind of issue and is sapping all your system resources. Luckily, there’s an easy way to find out if an app has gone haywire and is bogging down your computer.
You need to head over to Task Manager (accessed by pressing Control+Alt+Delete together), and click on More Details – you’ll then see a list of Processes, which is all the different apps and services currently running on your machine.
Scan down the list and look for any apps which are hogging CPU, memory or disk usage – or perhaps all of the above.
Once you’ve discovered the culprit, select it and there’s an option in the bottom-right corner to End Task. However, be careful that you aren’t ending important system-critical tasks (usually ones with confusing names that won’t mean anything to you), as this could cause your computer to crash.
If in doubt about whether you should kill a task, again, Google is your friend here – search for the app/service and you’ll almost certainly find an answer about exactly what it does.
Okay, so this isn’t the biggest problem to hit Windows 10 users by any means, but nevertheless it’s a worthwhile tip bearing in mind. When you’ve got a lot of programs open, minimising them all to get back to the desktop can be quite a chore when you have to click the little ‘line’ icon top-right again, and again, and again.
In actual fact, there’s a keyboard shortcut which will minimise all active windows in one fell swoop. Simply hit the Windows key+D and you’ll be back at the desktop in a jiffy. Getting into this habit saves a lot of time over the long run.
If you’re using an older PC (or a tablet) then having vibrant Live Tiles may end up draining processing power that could be used elsewhere (not to mention battery life with a slate).
This is something Microsoft has considered, though, and Live Tiles, which are present on the Start menu, can be switched off. To turn off one specific tile, right-click it, then click More > Turn Live Tile off.
Alternatively, to switch off all Live Tiles, open the Start menu, and type the following, then hit enter:
gpedit.msc
Navigate to Local Computer Policy > User Configuration > Administrative Templates > Start Menu and Taskbar > Notifications. Double-click the ‘Turn off tile notifications’ entry on the right and select enabled in the window that opens.
Microsoft included a wide range of accessibility tools with Windows 10, helping open up the operating system to users with different types of disability. If you’re having trouble using any aspect of Windows 10, just head to the Ease of Access hub.
You’ll find this under Start > Settings > Ease of Access. From here, it’s possible to toggle anything on or off that you want, including features such as audio descriptions, a magnifier, sticky keys, a high contrast option, and more. Simply select the features that will make your Windows life easier – with some settings, you may have to make further choices and then click the Apply button.
Continuum is definitely one of the coolest features that Windows 10 has to offer, but some users have reported difficulties getting it to work.
If you’ve never heard of it, Continuum essentially turns a compatible phone into a computer when paired with the Display Dock, an optional accessory from Microsoft.
If you’re having difficulties with Continuum, the first thing to check is whether you have the correct phone. Most of the phones that function with Continuum are high-end, like the Lumia 950, so if you have a mid-range Windows 10 handset you may be out of luck.
Next, check the connection with the Display Dock (the aforementioned optional extra), keyboard, and mouse. If they all seem to be in place just fine then the problem will most likely be with Windows 10 itself. Check the drivers by going to the Device Manager (to get here, type in ‘device manager’ in the Cortana/search box bottom-left) and look for the Display Dock as a hardware accessory. You can check the driver version by right clicking on it and selecting Properties, and update them via the same right-click menu if you choose Update Driver Software.
Maps is powered by Bing and it’s a smart little built-in program for Windows 10 that works just like Google Maps, but comes as a native app on the desktop, rather than a browser-based service.
Sometimes, however, Microsoft’s provided maps aren’t quite as good as Google’s own. But there is something you can do about this, in terms of playing a small but important role in improving the app, and that’s to report any problems to Microsoft. You can do so in the app’s settings (accessed by clicking on the three dots top-right) using Send Feedback at the bottom, and this will alert the company to the issues you’re having, and hopefully down the line the program will see appropriate improvements.
Microsoft bundles a music streaming service with Windows 10, Groove Music, and the song selection is pretty good. It also comes with the added bonus of integration with Xbox and any other Windows devices.
The downside, of course, is that you may well have spent time creating playlists in Spotify, Google Music, Tidal, or wherever else – so you might not want to use Groove. Luckily, all of these alternative applications are available on Windows, and you’ll find some in the Windows Store, so you can always easily switch your service of choice.
Browser-based streaming services – like Google Music – are also supported, of course, but bear in mind that they may not work well in Edge, because Windows 10’s browser doesn’t stream multimedia when minimised.
At any rate, to set the default music service (i.e. the one songs will automatically play with), head to Start > Settings > System > and select the Default Apps tab in the column on the left. You’ll see a Music Player section, which will present options based on which players you have installed. Simply select the one you want and hit OK.
Netflix and Amazon Prime both work on Windows 10’s default browser, Edge, but may need an update to Silverlight, an application framework that Microsoft created and maintains.
If you’ve upgraded from a Windows 7 PC you could well suffer from this issue, as the older version of Silverlight may have travelled across when you migrated.
At any rate, if you’re encountering streaming gremlins, to fix the problem and get back to binge watching House of Cards, go to this Microsoft site where you can reinstall Silverlight – follow the instructions as detailed on the web page.
Windows 10 is unique among operating systems for just how many different device classes it runs across. As well as PCs, the same core of the OS is used across tablets, smartphones and the Xbox. And it’s possible to hook up your PC with your Microsoft console, should you wish – although if you’ve been scratching your head as to how to do so, it’s simple enough.
First you need to open the Xbox app on your PC (to find it, type ‘xbox’ into the Cortana/search box bottom-left), select Connect, and it will automatically scan your home network for a compatible device. When you see the Xbox in question, select it and the pairing process will start.
After you’ve done this, files and other information will be shared between the two devices. It’s definitely something that’s worth doing if you own a Windows 10 PC and an Xbox, if only to show off to your PS4-toting friends.
Do you feel like it takes you ages to get anything done in Windows 10? The Quick Access menu is located in File Explorer (right-click Start to see the option for File Explorer) and it can save a ton of time when navigating around the operating system.
To add files, folders or apps to the sidebar, right click on their icon and select Pin to Quick Access. This means that they will show up and can be easily accessed, which is useful for recently visited folders.
You can also set File Explorer to load the Quick Access menu by default when you bring it up, rather than This PC. To do so, with File Explorer open, click on the View tab in the top menu (next to Share), then click on ‘Options’ on the far-right of the menu that pops up, then select ‘Change folder and search options’. Now look where it says ‘Open File Explorer to’, and use the drop-down menu to select Quick Access.
Another good method of getting things done quickly and being more productive under Windows is to use the plentiful keyboard shortcuts which are available.
The main key utilised for shortcuts is the Windows key which can be used in combination with Tab (to open Task View), any direction key (to snap windows in place), C (to open Cortana), I (to open Settings), and so on.
The Control key is mostly used in-app for things like copying and pasting, which can save a huge amount of time. For more keyboard tricks, have a read of our 20 keyboard shortcuts Windows 10 users need to know about.
On a Mac, taking a screenshot is a simple process. On a Windows PC, however, it’s slightly more complex. To take a screenshot of the whole screen on Windows 10 you just press the PrtScn (Printscreen) key, although you then have to paste that image into an app (like Microsoft Paint, where it can then be saved out as an image file, or Word, where it will appear in your document).
To take a screenshot of an active window or smaller section of the screen that’s in the foreground, press Alt+PrtScn together. There is no easy way to take a screenshot of a chosen area that isn’t the full screen (i.e. half an active window), so the best bet in this case is to use the Snipping tool.
To access this, go to the Cortana/search box next to the Start button and type in ‘snipping’ and it will pop up. In the tool’s menu, click on the arrow next to ‘New’, and you can then select either a rectangular snip, or a freeform snip where you can draw a line around any region of the screen to capture it. You can then use the File menu to save the image for posterity.
We can’t cover everything in this feature, and obviously enough there’s a good chance that at some point, you’ll stumble across Windows 10 problems you can’t find the solution for on Techradar. Fortunately, Microsoft has support forums which offer solutions, help, and guidance for a lot of common (and uncommon) issues.
To access the forums, open your browser of choice and go to:support.microsoft.com/en-us. Topics are broken down into apps – like Office – and other categories, and obviously you’ll need to head to the Windows section. You can also contact Microsoft directly, via phone or instant message.
[Source:-Tech Rader]