Because of this, many users prefer to install a different GNU/Linux operating system, either by dual-booting with Chrome OS or by entirely replacing it. There are already numerous tutorials out there on how to employ the dual-booting method of installing a Linux OS on your Chromebook, but in this guide, we’ll try to explain the latter.
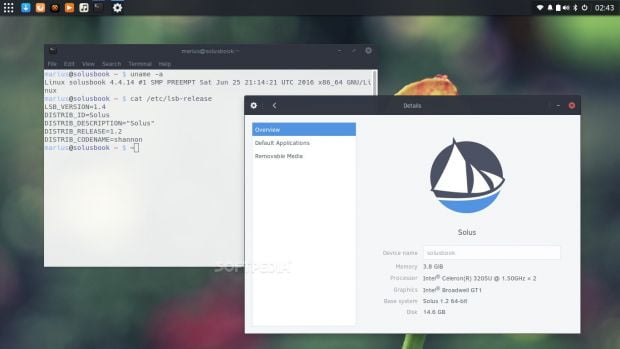
Yes, that’s right, replacing your Chrome OS with a GNU/Linux distribution is what we want to teach you, just in case you decide Chrome OS is too limited for your needs or because Google no longer offers updates for your Chromebook. And we have the perfect operating system to try this, Solus, which has just become a rolling release distro.
The best thing about Solus is that it kind of looks like Chrome OS, so you’ll get not only the looks of it, which you can fully bend to your needs, but also the whole power of a stable, fast, full-featured, and new rolling release Linux operating system. Of course, the following tutorial should work with any other distro.
Enabling developer mode in Chrome OS and activating USB boot
Before we get started, we would like to inform you about a few things. First, if you follow the next instructions to install a GNU/Linux distribution, you’ll erase your Chrome OS installation, but you can recover it later using various methods provided by Google on their support website.
The second thing is that every time you want to access your new Linux operating system, you’ll have to press the CTRL+L keyboard shortcut. Lastly, the third thing is that you’ll need to have a Chromebook with Intel hardware, not ARM. Also, you’ll not see any bootloader with some Chromebook models.
We’ve tested this guide on an Acer C740 Chromebook. The first thing you need to do is decide which distribution of Linux you want to use, download the latest ISO image (make sure it’s a Live ISO with a graphical desktop environment) and write it on a USB flash drive. Insert the USB stick on your Chromebook.
Open your Chromebook and shut it down. Now press and hold the ESC and Refresh keys on your Chromebook’s keyboard, and then press the Power button for a few seconds until you see a warning screen. Immediately press the CTRL+D keyboard combination to activate the developer mode, which should take a few minutes.
Once the developer mode is enabled, you’ll be asked to enter your Chrome OS credentials. Then, everything will be synced back with your Chromebook. During this time, hit the CTRL+ALT+T keyboard shortcut to open the developer mode’s terminal. There, type the shell command and hit Enter.
Now run the sudo crossystem dev_boot_usb=1 dev_boot_legacy=1 command and hit Enter. Make sure that the USB stick with the Linux distro you want to install is still plugged into your Chromebook. Shut down the machine. Restart it, and when you see the warning screen again, quickly press the CTRL+L key combination to boot from the USB drive.
Booting from the Live USB and installing the Linux operating system
The GNU/Linux OS should now load from the USB stick, and in about one or two minutes, you should see the live session. Connect to the Internet and install the operating system as you normally do on any other computer. Once the installation is finished, shut down the computer. Remove the USB drive and power up your Chromebook, quickly pressing the CTRL+L keyboard combination.
Your new GNU/Linux distribution should now start. That’s it! Once again, please note that, on our Acer C740 Chromebook, we aren’t able to see the SeaBIOS open source implementation of a 16bit x86 BIOS everyone is talking about, which should allow you to choose which device to boot, so this could happen on other Chromebook as well. Don’t hesitate to comment below if you run into any issues.


