If you run a device that is powered by Microsoft’s Windows 10 operating system, you may have noticed Microsoft Edge processes in the Task Manager or another program even if you don’t run the program.
These processes, MicrosoftEdge.exe, MicrosoftEdgeCP.exe, and MicrosoftEdgeSH.exe, show up as suspended in the task manager.
The processes use no CPU or memory in suspended state; some users may prefer to block Microsoft Edge from running in the background even in suspended state. If you never use Edge, there is virtually no reason why it should launch in the background.
Note that the process works fine on recent versions of Windows 10. It may not work with the not-yet-released Chromium-based version of Microsoft Edge; we will see.
The process requires editing of the Windows Registry and a Settings change. Note that you can still run Microsoft Edge on the device.
Here we go:
Settings app

The very first thing you want to do is prevent Edge from running in the background:
- Use the shortcut Windows-I to open the Settings application on the Windows 10 device.
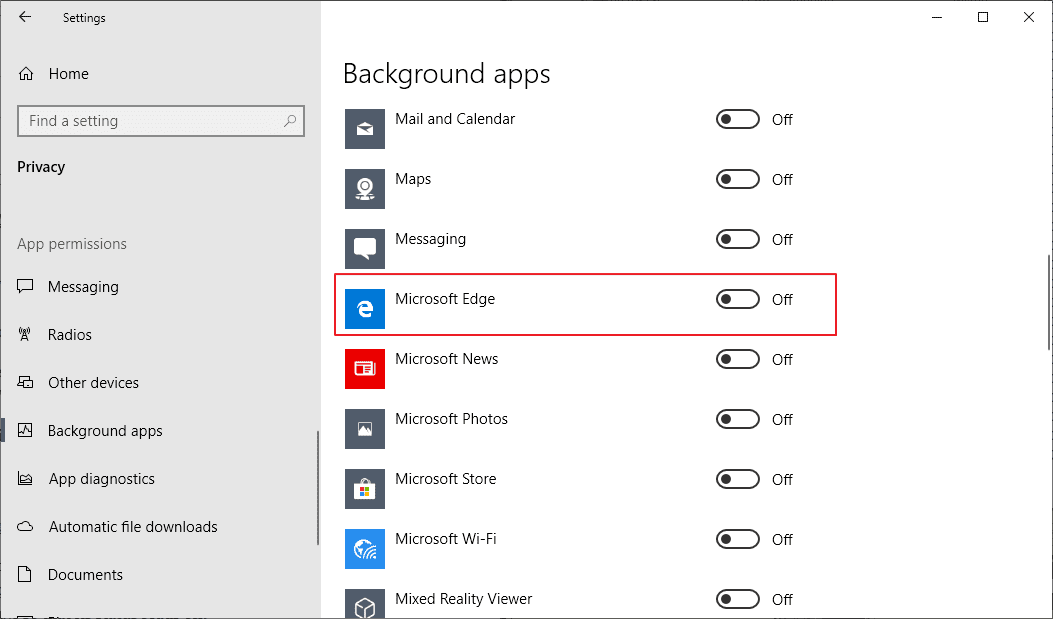
- Go to Privacy > Background Apps.
- Toggle Microsoft Edge on the page so that its status reads off.
Windows Registry

You need elevated privileges to edit the Registry. I recommend that you create a backup of the Windows Registry before you make the changes.
You can download Registry files from Majorgeeks to make the changes without editing the Registry manually. It is usually better if you make the changes manually to better understand what is being changed.
- Tap on the Windows-key, type regedit, and hit the Enter-key on the keyboard to launch the Registry Editor.
- Confirm the UAC prompt that is displayed.
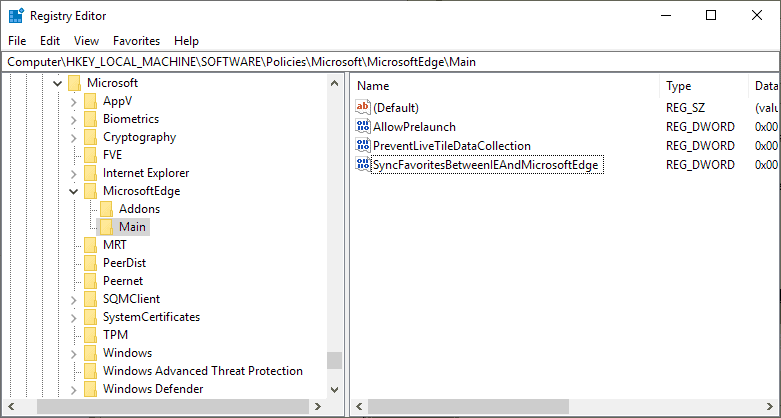
- Go to HKEY_LOCAL_MACHINE\SOFTWARE\Policies\Microsoft\MicrosoftEdge\Main
- If Main does not exist, right-click on MicrosoftEdge and select New > Key, and name it Main.
- Tip: if you make a mistake naming something, right-click on it and select rename to change the name.
- Right-click on Main and select New > Dword (32-bit) Value.
- Name it SyncFavoritesBetweenIEAndMicrosoftEdge
- Double-click on it and set its value to 1.
- Right-click on Main and select New > Dword (32-bit) Value.
- Name it PreventLiveTileDataCollection.
- Double-click on it and set its value to 1.
- Right-click on Main and select New > Dword (32-bit) Value.
- Name it AllowPrelaunch.
- Make sure the value is set to 0 (it is the default).
- Go to HKEY_LOCAL_MACHINE\SOFTWARE\Policies\Microsoft\MicrosoftEdge\TabPreloader
- If TabPreloader does not exist, right-click on MicrosoftEdge and select New > Key, and name it TabPreloader.
- Right-click on TabPreloader and select New > Dword (32-bit) Value.
- Name it PreventTabPreloading.
- Double-click on the new value and set it to 1.
- Right-click on TabPreloader and select New > Dword (32-bit) Value.
- Name it AllowTabPreloading.
- Make sure its value is set to 0.
- Restart the computer.
[“source=ghacks”]


